- Tech, OC'ing, SEO and more
- Hits: 95074
User Rating: 3 / 5


Article Index
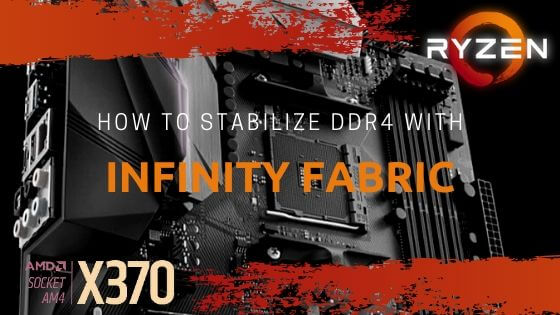
AMD Ryzen 5 1600X overclocking guide.
Here is my overclocking guide for the R5 1600X based on my experience using an ASUS X370 Gaming for a better V.R.M. over a B350 chipset. After some months I decided to upgrade my 1600 to a 1600X to see if there is a difference in performance, on paper at least the X series should offer higher clock speeds. Upgraded to an X CPU but I did not get a Ryzen 7 over a Ryzen 5 since clock speeds remain the same, the Ryzen 5 1600X and Ryzen 7 1800X offer the best clock speeds. So for anyone looking for a CPU for gaming higher clock speeds take president over core count for the best experience.
My Rig, PC Partpicker.
Link: https://pcpartpicker.com/list/GvtDkd
- Case: Phanteks Enthoo Luxe.
- Motherboard: ASUS STRIX X370-F.
- CPU: Ryzen 5 1600X Retail.
- RAM: G.Skill - Trident Z RGB 32GB 3200
- GPU: ASUS STRIX GTX 1080ti.
- P.S.U.: E.V.G.A. SuperNOVA G3 750W Gold.
- Samsung 960 EVO, O.Z.C. Agility 3 256GB, W.D. Green/Blue 1TB storage drives.
- Cooling: CoolerMaster LiquidMaster 240 AIO.
- Case fans: 4 x 140mm intake fans, 3 x 140mm + 1 x 120mm exhaust fans.
If you read my previous article regarding the Ryzen 5 1600, you will see I have made substantial upgrades to my P.C. As it stands, the only matter is that the 1080ti seems slightly bottlenecked by the lower per-core speed over an Intel CPU.
However, as newer games enter the market supporting better multicore performance, this will negate this current gap for AMD relative to Intel. Pure performance-wise an i7 would be better but for a more significant premium and it would only be for gaming.
You can find the related guides here:
Ryzen 5 OC'ing the 1600.
Intel i7 OC'íng the 8086K on Z390.
Streaming and/or recording using OBS NDI Tutorial.
Getting Started with overclocking the AMD Ryzen 5 1600X.
As always insert your desired hardware and ensure it boots and windows version of your taste is installed. For this guide, I used an A.S.U.S. motherboard and a 240 AIO for cooling. Air cooling might make it harder to achieve a higher overclock.
The principle remains the same as well as using a different vendor. However, they might use different wording then A.S.U.S. Also, make sure to run a baseline benchmark to check stability at stock settings and scores so you can measure any gains. Check your BIOS version especially with Ryzen updates do tend to offer more excellent stability especially RAM wise.
You also want to download the following programs for stress testing your overclock. These are a vital tool for stress testing and monitoring if you already have tools you can use those but these programs I highly recommend and were used while writing this overclocking guide.
- HWiNFO64: https://www.hwinfo.com/download/
- Prime 95: https://www.mersenne.org/download/

BIOS Settings.
Ensure you run stock DDR4 RAM speeds that is 2133mhz with stock timings. As you might be aware of Ryzen is a bit funky when it comes to RAM, but higher MHz will yield a faster system. The RAM clock speeds tie into the infinity fabric that "glue's" chiplets together in the die. For the best results ensure you have Samsung B-Die or Hynix A-Die IC's, you can check the Q.V.L. or RAM manufacturer as well as use Typhoon Burner. Note the screenshot below has my D.O.C.P. profile the highest settings, keep the stock timings for now and change this after finishing your CPU overclock.

Now to get down to getting the best out of your chip without burning the house down. As always you are bound by the "silicon lottery", and on this draw, I have the short straw because I am not getting better clock speeds. Good chips can run 4.1Ghz with proper voltages mine are a bit on the high side, and I tuned down my overclock just to be saved.
DIGI+ VRM Settings Ryzen 1600X.
The X370 offers much more in the BIOS for overclocking, a greater range of settings then a B350 board as well as a better V.R.M. A better V.R.M. translates into a more stable power supply, fewer fluctuations resulting in great stability.
- VDDCR CPU Switching Frequency to 300, a higher frequency tends to be a waste of power.
- V.D.D.C.R. SoC Switching Frequency to 300, a higher frequency tends to be a waste of power.
- VDDCR CPU Current Capability & V.D.D.C.R. SoC Current Capability to 130%, in short, how much power it can draw over the baseline of 100% to 130%.
- VDDCR CPU Power Phase Control & V.D.D.C.R. SoC Power Phase Control both set to extreme.
- VDDCR CPU Load Line Calibration & V.D.D.C.R. SoC Load Line Calibration set to level 3, higher or lower resulted in instability in my case yours could be different.
These settings are the best for my chip, especially the Line Calibration settings vary from chip to chip if you are close to stable make changes here.

AMD CBS.
Settings of importance here are Core Performance Boost. This will set your clock speed to the number entered in the BIOS without a boost. If you leave this one, it will result in instability due to the chip trying to boost higher frequency, when running at the highest frequency this will result in crashes. And a Global C-State Control should also be disabled since this function is for power savings and would try to downclock your CPU and down volt VDDCR CPU voltage.

Ryzen 1600X V.D.D.C.R. Core Volts.
As with the Ryzen 5, 1600 the none X the same volt limits apply, going beyond those will result in your CPU degrading to the point it will not maintain the overclock. Also to note is that the X version has a higher set temperature not to be alarmed by higher numbers, this is why better cooling is essential. When stress testing the overlock, you want to use a tool like HWiNFO64 to monitor temperatures, clock speeds, and voltages.
- AMD Recommended Voltage: 1.350 to 1.375 volts.
- Community Recommended Voltage: 1.400 to 1,450 volts.
- Absolute max and not recommended: 1.500 to 1550 volts.
The two settings you will have to adjust here are CPU Core Ratio and VDDCR CPU Voltage. The first is a straight-up number the latter is an offset number. On the X370 you either use Offset Mode or Manual Mode, Offset Mode offers better granular tweaking over manual Mode so we will be using Offset Mod. Now it comes down setting the CPU Core Ratio, start at 38.00 and then set the Offset mod to 0.0375. This should work on any system. If this does not post, you have a terrible CPU that will be a nightmare to overclock, and getting higher frequencies will need exponential more volts. Run a quick Cinebench to see if your stable if so reboot and head back into the BIOS, now set the CPU Core Ratio to 38.50 and keep the Offset mode as is. Repeat the process add 0.20 until your Cinebench test fails. Now you can add more volts in the Offset mode, an Offset of 0.07500 will give 1.425 V. But do not go straight to an Offset of 0.07500, up the voltage 0.00625 then see if your system will post and then increase the CPU Core Ratio again until it fails. With a bit of luck, you should be stable at 40.00, a 4.0Ghz on all cores the less voltage it takes to get to 4.0Ghz the better your CPU is. Fewer volts is less heat and a higher overall overclock see if you can make it to a CPU Core Ratio of 41.00 with 0.07500 Offset or lower.

V.D.D.C.R. Curve.
Here is my V.D.D.C.R. volt curve for my 1600X I must add that this was added well over a year later with a much more mature BIOS version for my STRIX X370-F. But all settings were tested using a Gelid Phantom Black CPU Cooler(dual fans). Depending on your motherboard and CPU due to the silicone lottery, your mileage may vary but this should give you a good indication where your CPU is compared to this 1600X sample.
1600X @ 3.7Ghz.
- 37 Core Ratio.
- VDDCR @ 1.325
- CPU LLC 3
- SOC LLC 3
- Validation with P95 Small FFT's and Custom 8K FFT's.
1600X @ 3.8Ghz.
- 38 Core Ratio.
- VDDCR @ 1.350
- CPU LLC 4
- SOC LLC 4
- Validation with P95 Small FFT's and Custom 8K FFT's.
1600X @ 3.9Ghz.
- 39 Core Ratio.
- VDDCR @ 1.39375
- CPU LLC 5
- SOC LLC 5
- Validation with P95 Small FFT's and Custom 8K FFT's.
1600X @ 4.0Ghz.
- 40 Core Ratio.
- VDDCR @ 1.450
- CPU LLC 5
- SOC LLC 5
- Custom 8K FFT's(not deemed fully stable).

Now when you have achieved a stable overclock, it is time for a proper burn-in test to validate your overclock and ensure it is completely stable. Use Prime95 and run that for at least 30 minutes to an hour, if your overclock holds it will be completely stable under stress as well as average load. If your crash on Prime95 that means you're overclock is unstable, and you have to lower the CPU Core Ratio or increase the Offset voltage. Make sure you keep an eye on your temperatures, HWiNFO64 is a useful software-based monitoring tool although actual sensors will be more accurate. This concludes the overclocking guide for the Ryzen 5 1600X on an ASUS X370 motherboard, remember mileage may vary and may Gaben be with you.
- Paul "HisEvilness" Ripmeester