- Tech, OC'ing, SEO and more
- Hits: 59107
Article Index
Advanced Overclocking: Curve.
This method works best if you are using MSI Afterburner since it gives better granular control over the curve. Using the curve method has more advantages over the sliders method since you will have a stable voltage, a higher frequency and slightly better temperatures since you will slightly under-volt. The GTX 1000 series has a default curve that has a base value of 40C. After the 40C threshold, you will lose voltage and 12.5mhz per 10C. In short, If you reach 2000mhz with a base temperature of 40C but the GPU heats up to 50C you will lose voltage and 12.5mhz. This will set your GPU clock speed to 1987mhz. The max voltage for all GTX 1080ti's set in the BIOS is 1.093v.
Default Curve.
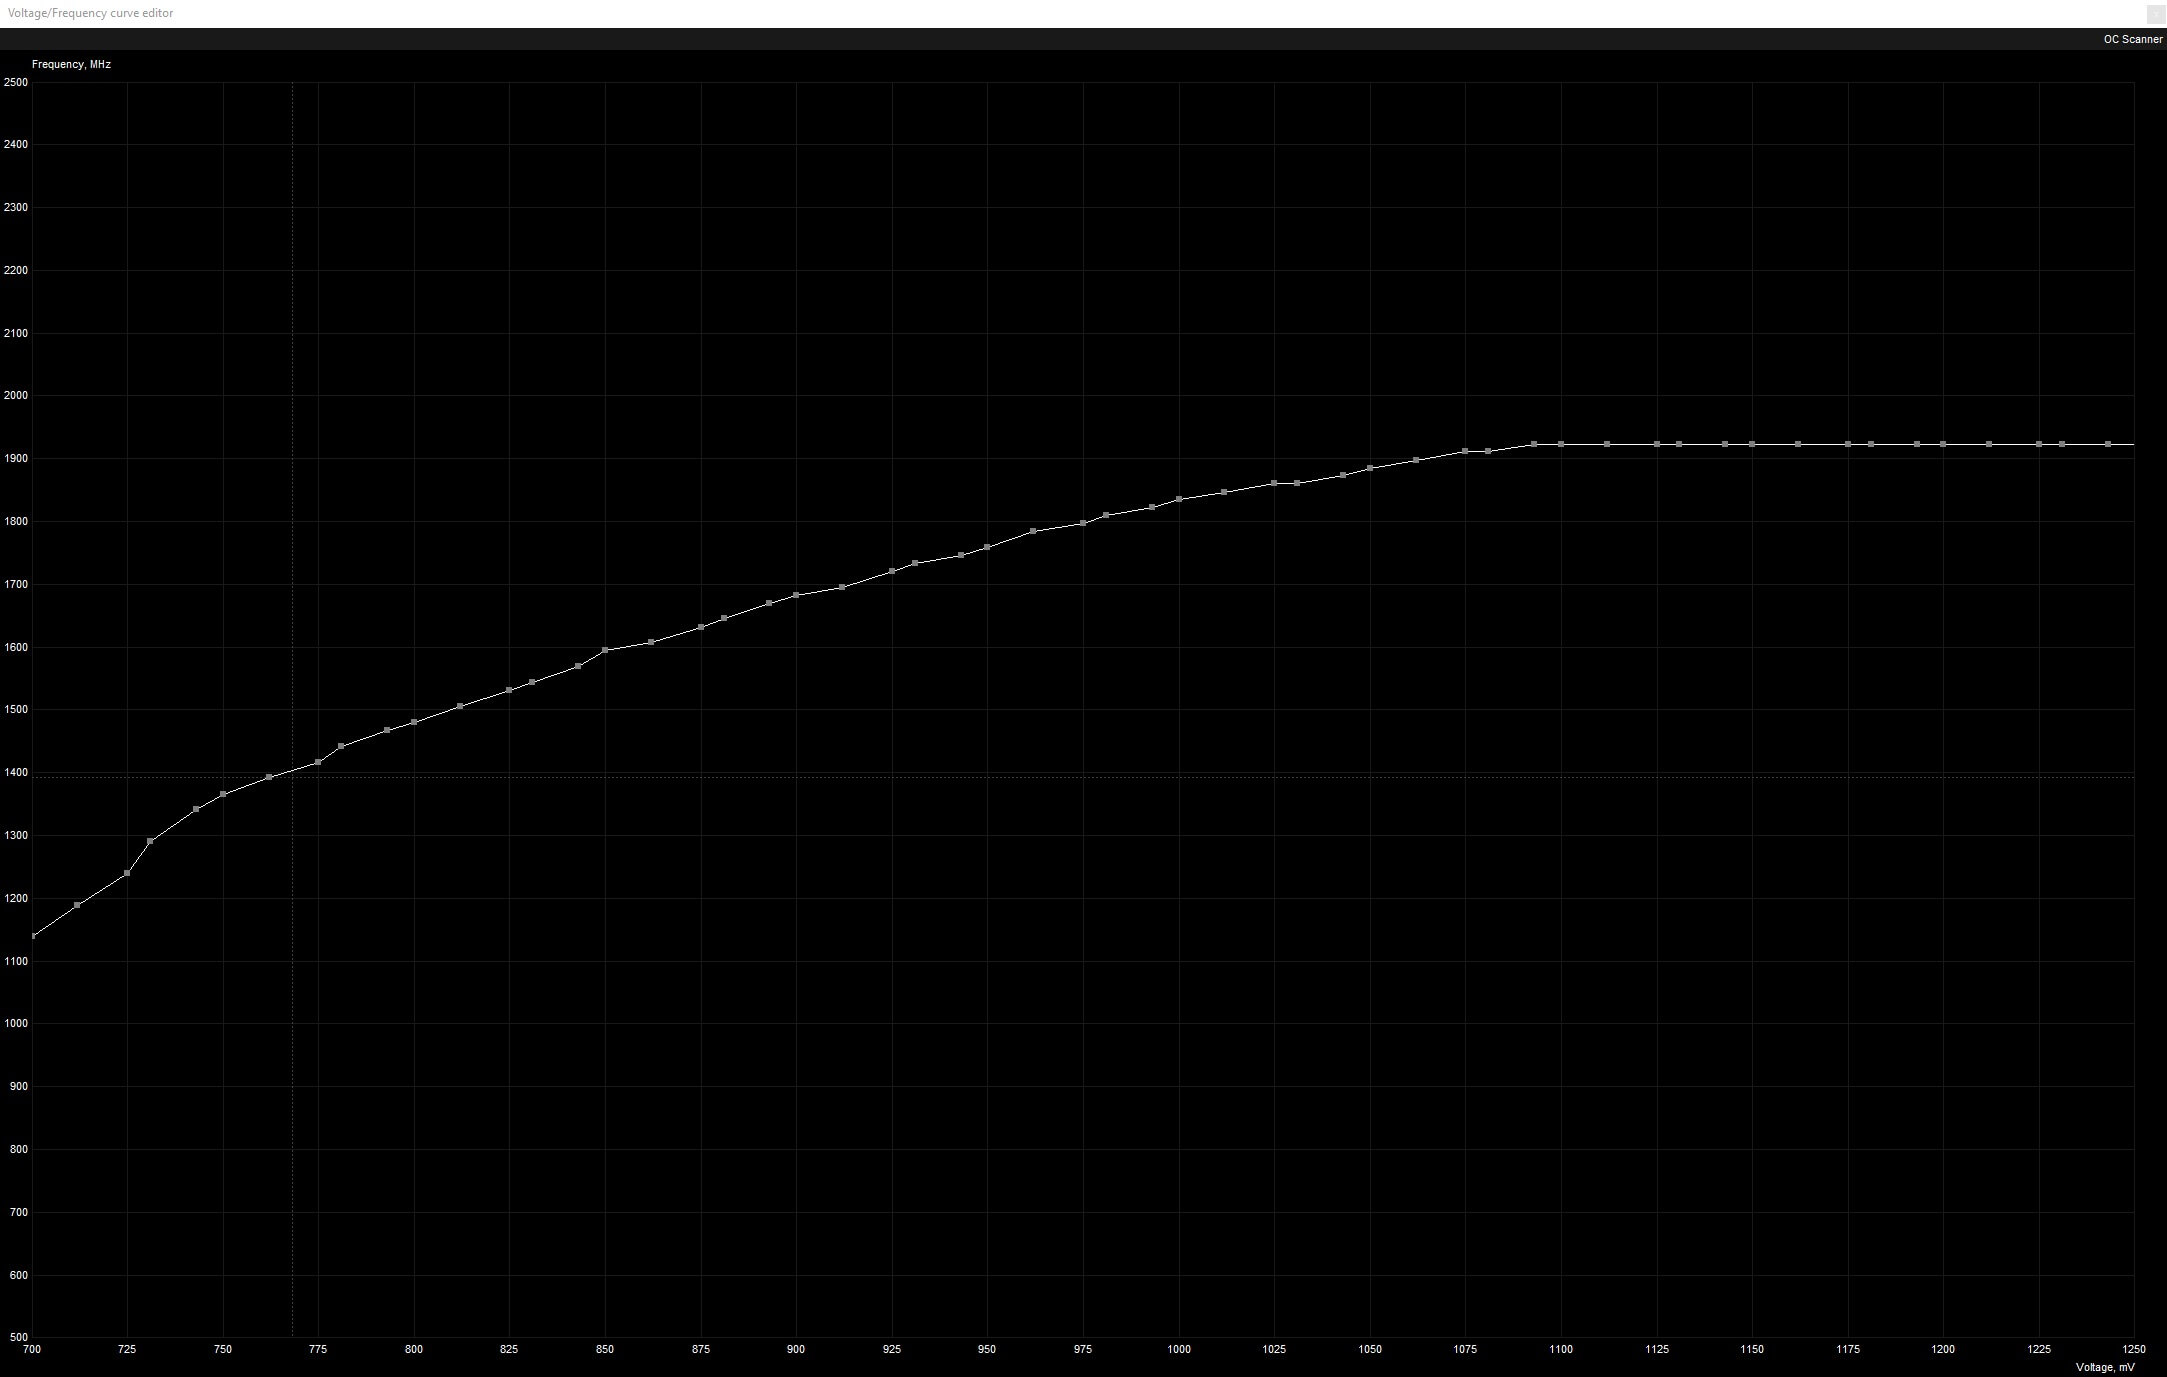
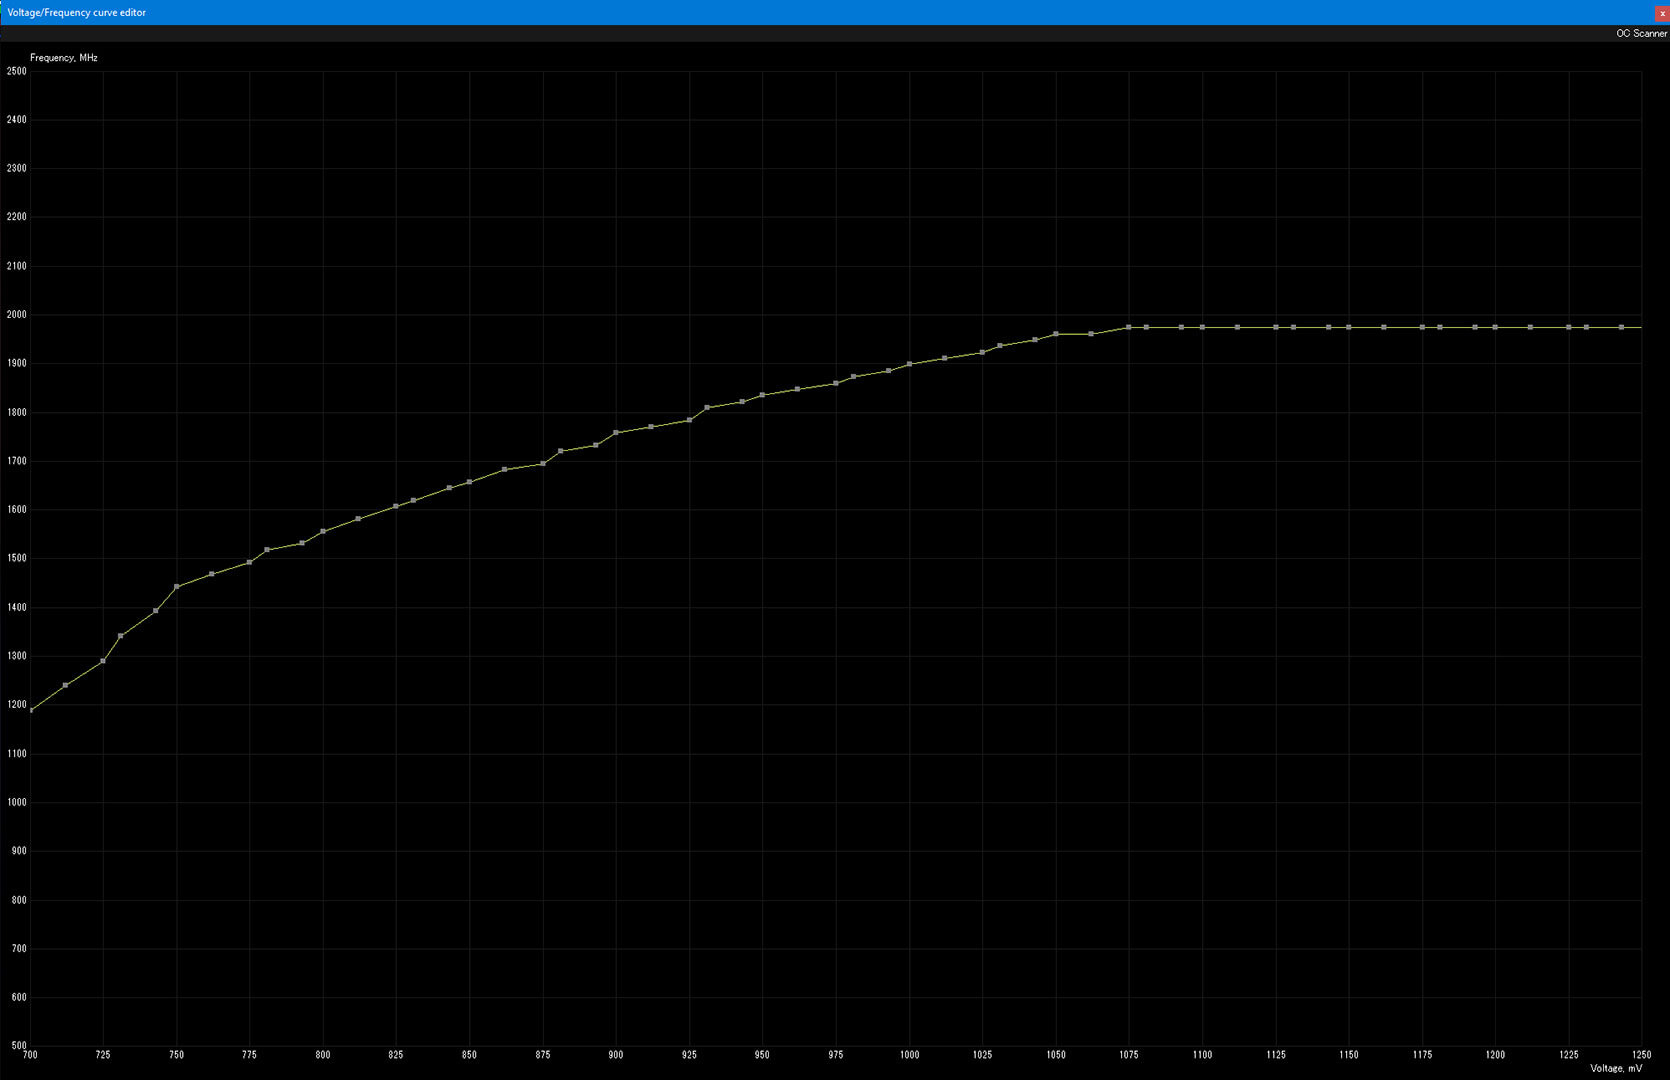
Before starting with this part of the guide make sure your GPU is below 40C this will set the GPU to the default voltage curve. This is very important or your overclocking results might suffer. Also, ensure your memory frequency is set to base value by simply resetting it. Below are 2 screenshots of the default voltage curve when the GTX 1080ti's are below 40c.
ASUS ROG GTX 1080ti Strix.
MSI GTX 1080ti Gaming X.
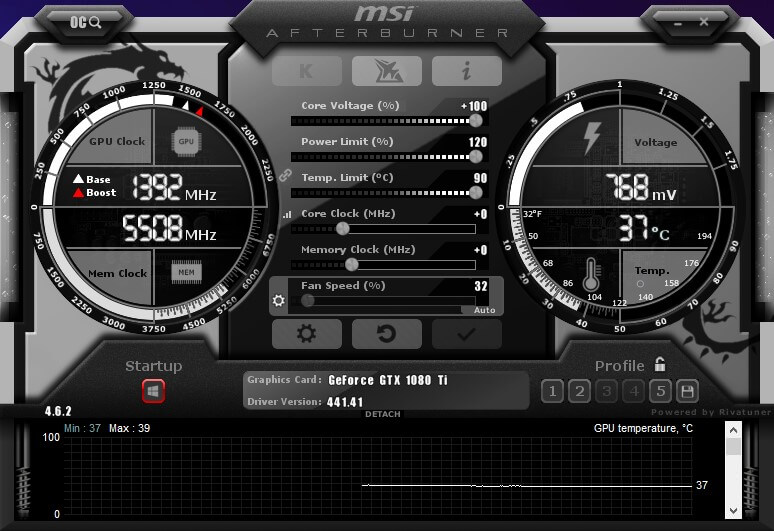
There are several settings you want to verify in MSI Afterburner with the following steps.
1.) Ensure Core Voltage slider is set to +100, this will ensure you won't lose voltage after 40C in your final overclock. Move the Power Limit slider to 120, this ensures max power draw per the voltage curve.
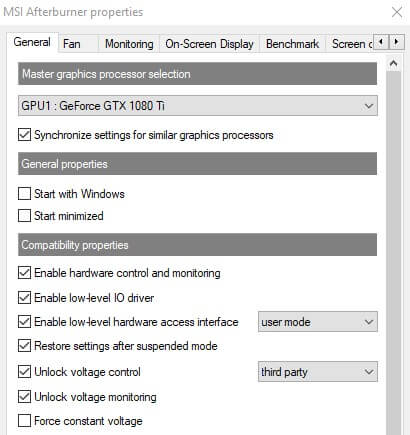
2.) In MSI Afterburner General settings make tick the Unlock voltage control & Unlock voltage monitoring and select third party table.
3.) Set an aggressive fan curve that will cool down your 1080ti between testing and ensures max realistic cooling under load. This differs per case, ambient noise, etc yours might differ. An even more aggressive fan curve could be used just for testing and benchmarking purposes.
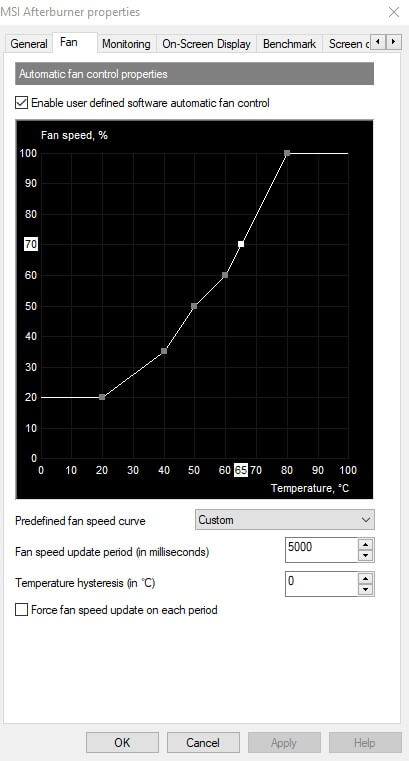
For easier recovery save the default unedited settings with settings and fan curve applied to a profile in MSI afterburner.
Curve Tweaking.
Now open the curve editor by clicking CTRL+F and look for the 1050mv mark on the bottom and the 2000mhz mark on the side and drag the curve-point over the 1050mv line to the 2000mhz line. Don't worry about being exactly on the 2000mhz mark because as soon as you click apply in MSI it will default to the closest bin in this case 1999mhz/2000mhz. And exit the screen and click apply in MSI Afterburner.
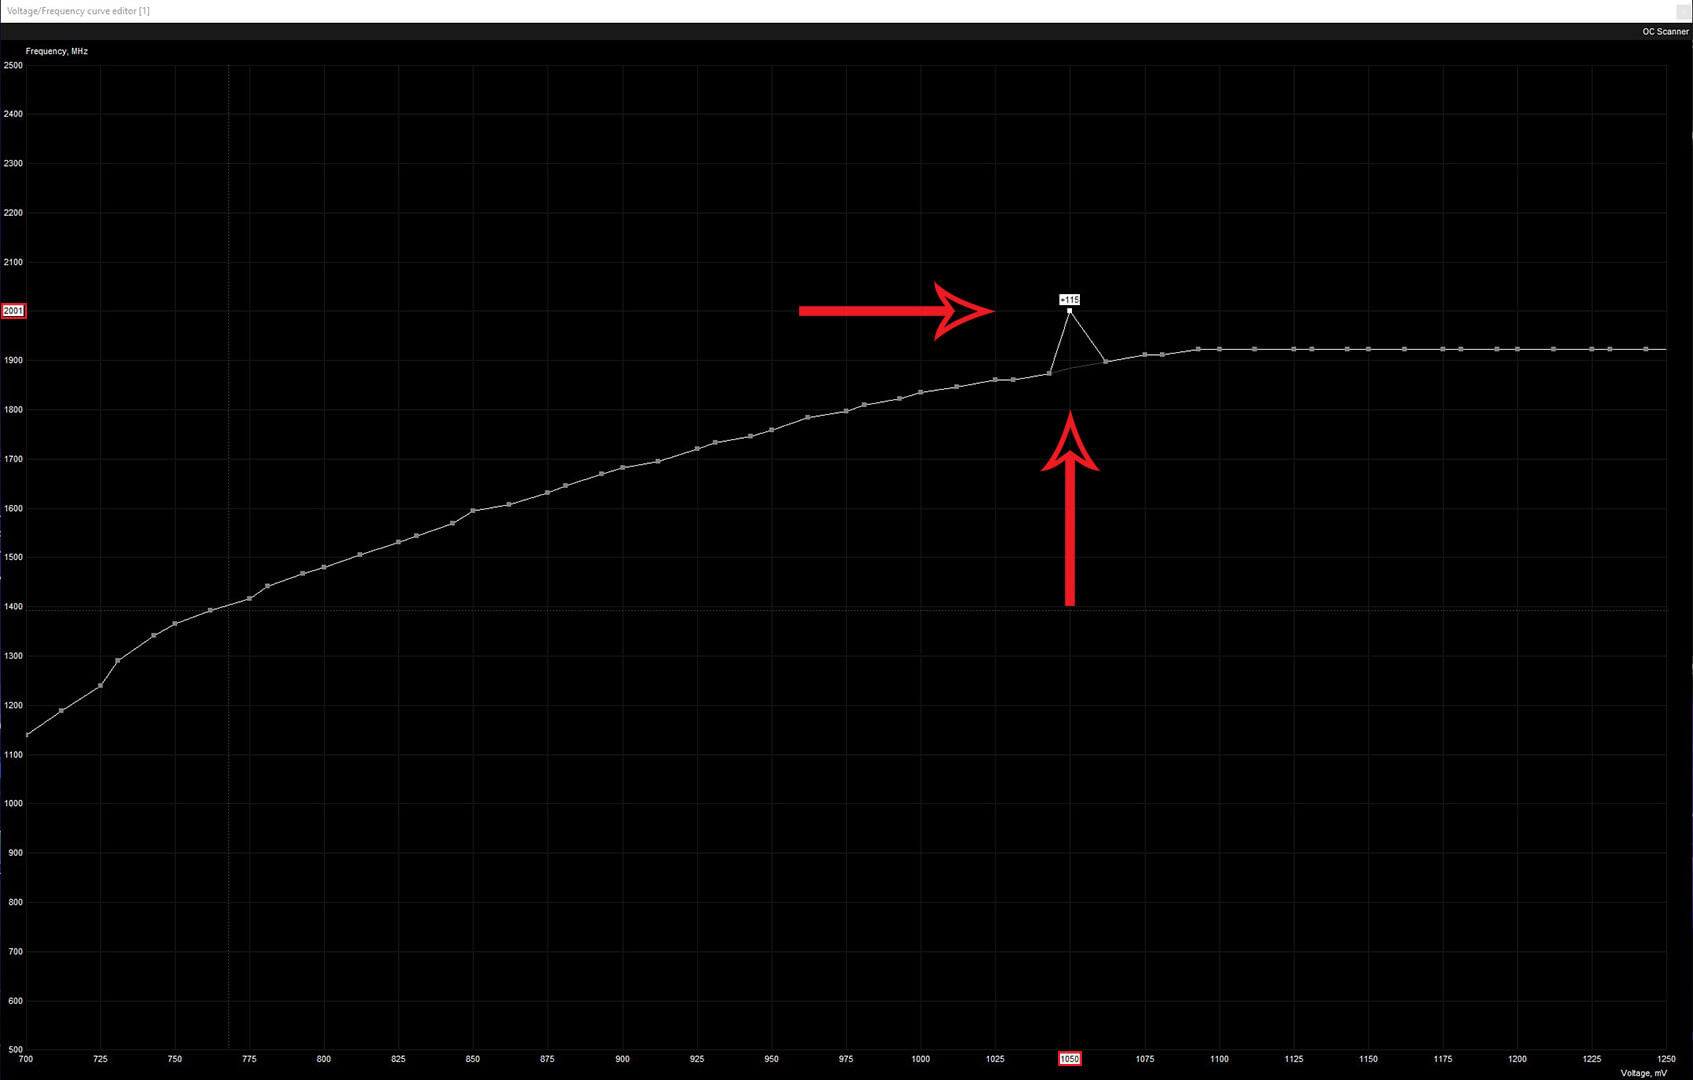
The new voltage curve should now look something similar to the screenshot below. The curve should be a straight line to the right after 1050mv mark.
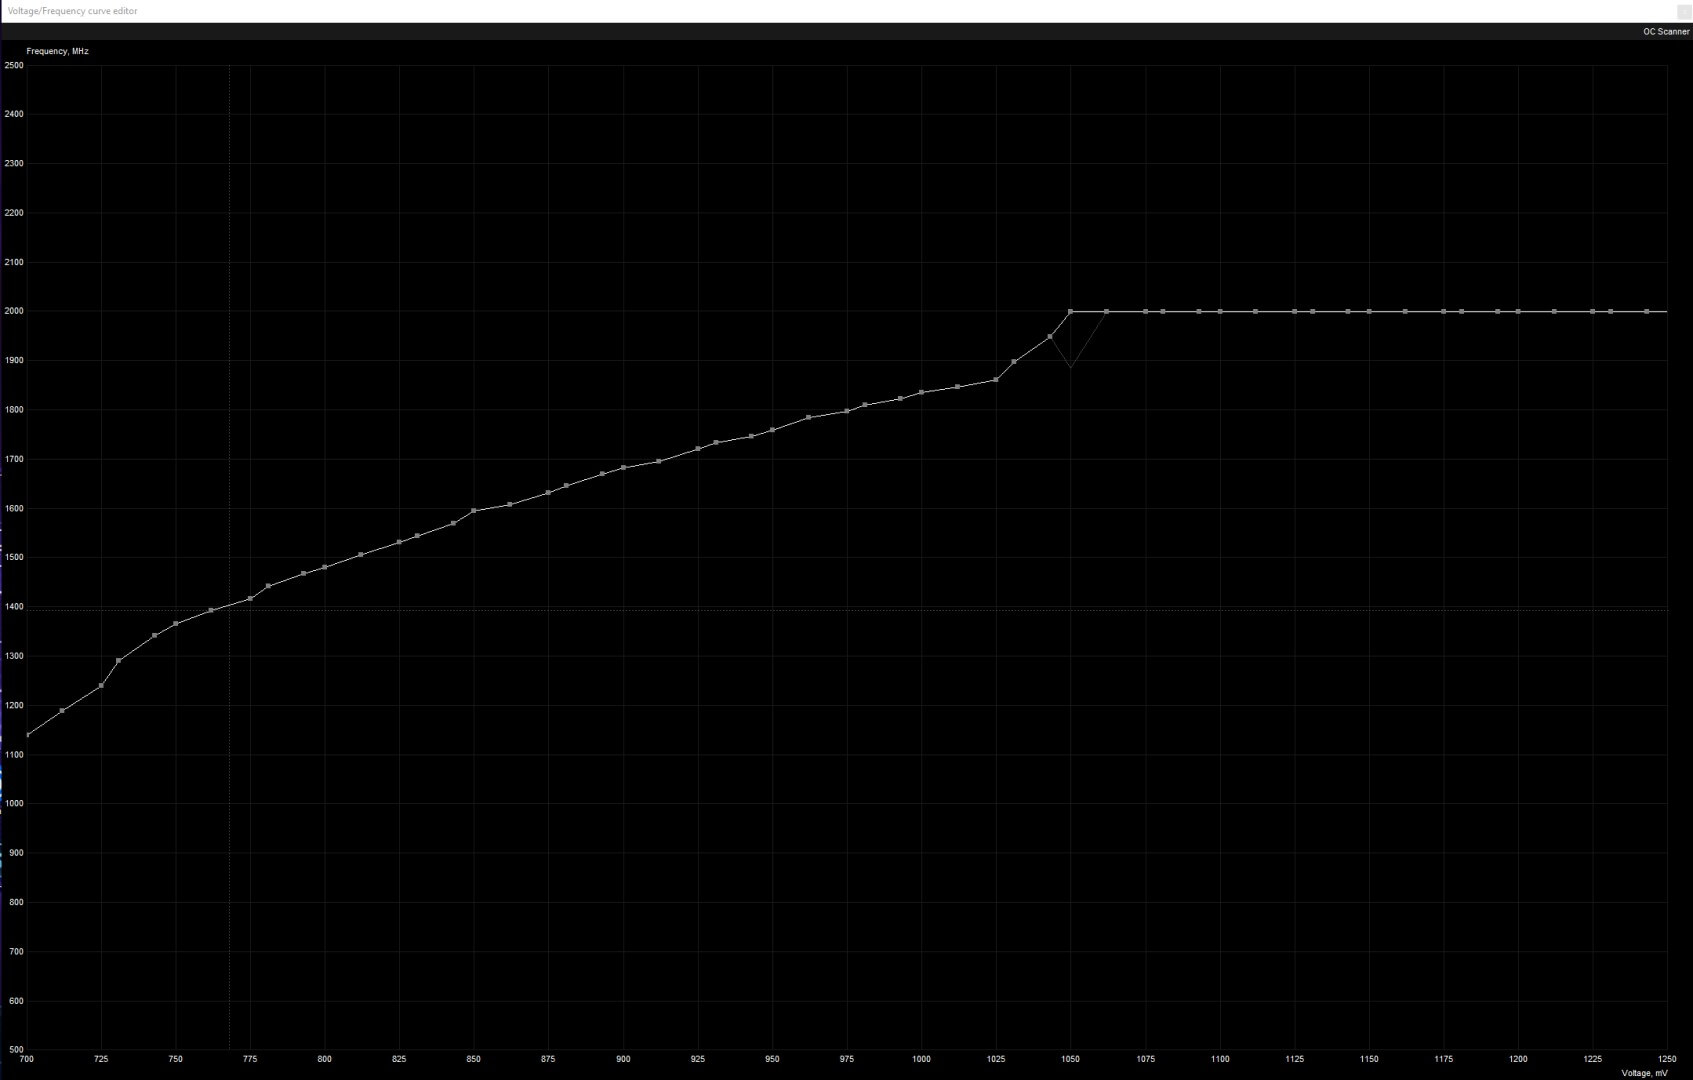
2000mhz with 1050mv Curve.
Now run Heaven benchmark and make sure that it is not full screen so you can bring MSI afterburner to the front. Check if the 1050mv and 1999mhz/2000mhz remain the same when the GPU is still below 50c. Let Heaven run for a couple of minutes until the temperature levels out.
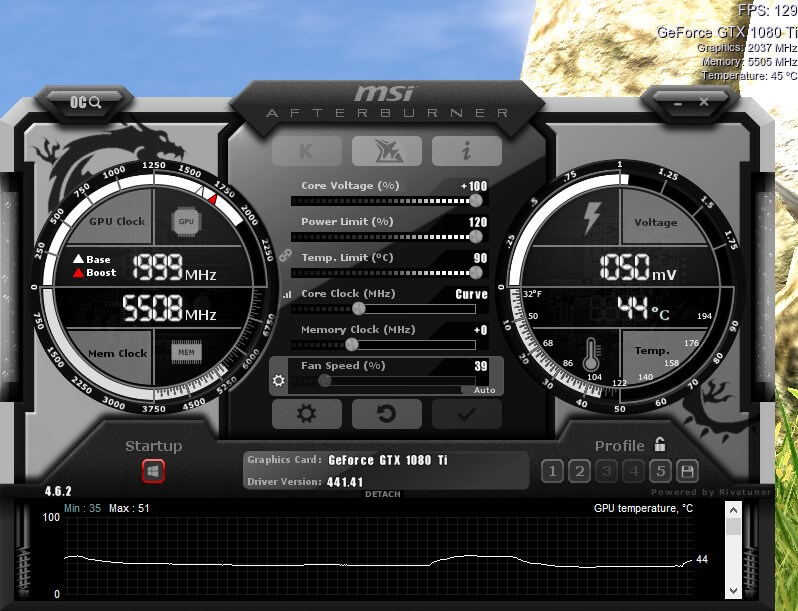
Here you can see you lose 1 bin of 12.5mhz when the GPU heats up to 50c while retaining the voltage due to the curve method.
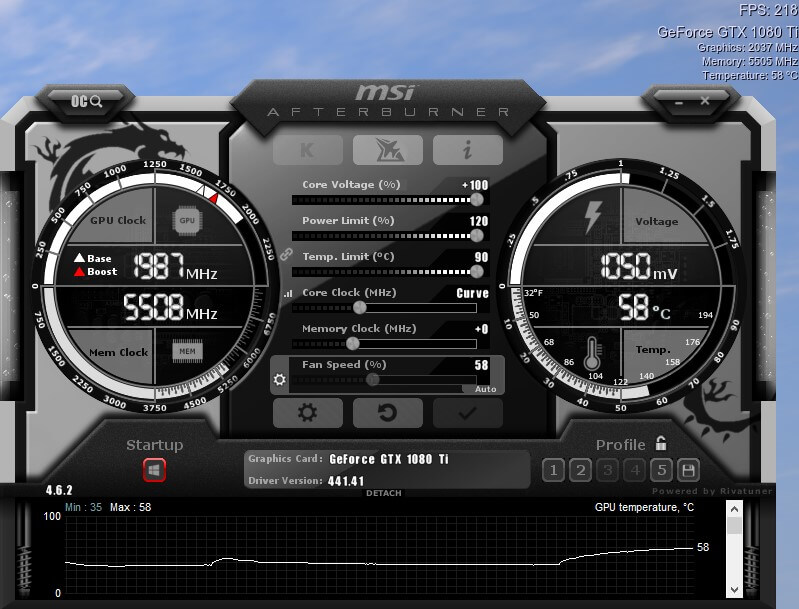
2025mhz with 1050mv Curve.
Now you open the curve editor again by hitting CTRL+F and drag the curve node to 2025mhz. Exit the curve editor and hit apply in MSI afterburner. Make sure the GPU is below 40c before starting the Heaven benchmark. Verify the 2025mhz and 1050mv numbers and let Heaven run for a couple of minutes again. You will lose 1 bin of 12,5mhz when the GPU reached 50C setting the clock speed to 2013mhz.
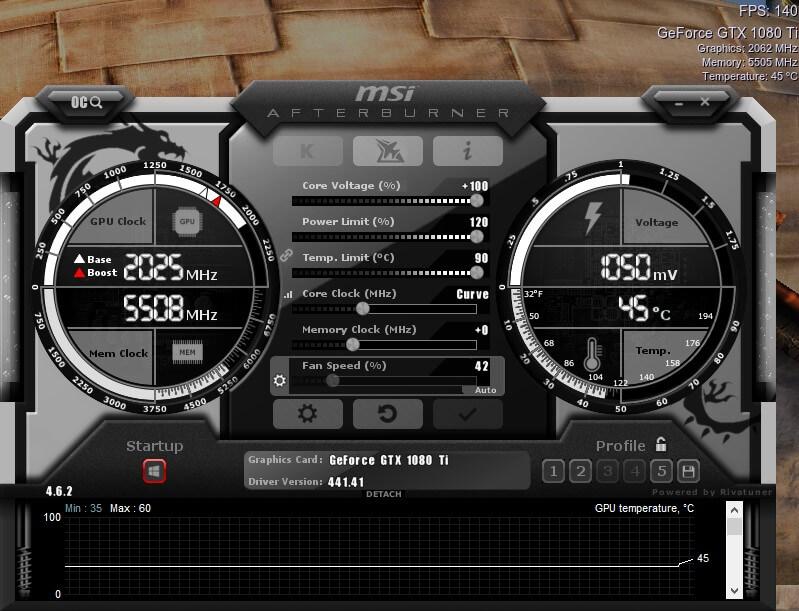
2050mhz with 1050mv Curve.
Open the curve editor again by hitting CTRL+F and drag the 1050mv node to 2050mhz. Exit the curve editor and hit apply in MSI Afterburner. Before starting Heaven benchmark make sure the GPU is below 40c. Here verify again the 2050mhz and 1050mv numbers. Let Heaven run for a couple of minutes so the temperature levels out. Here you will as well lose 1 bin of 12.5mhz when the GPU reaches 50c. For a clock speed of 2037mhz.
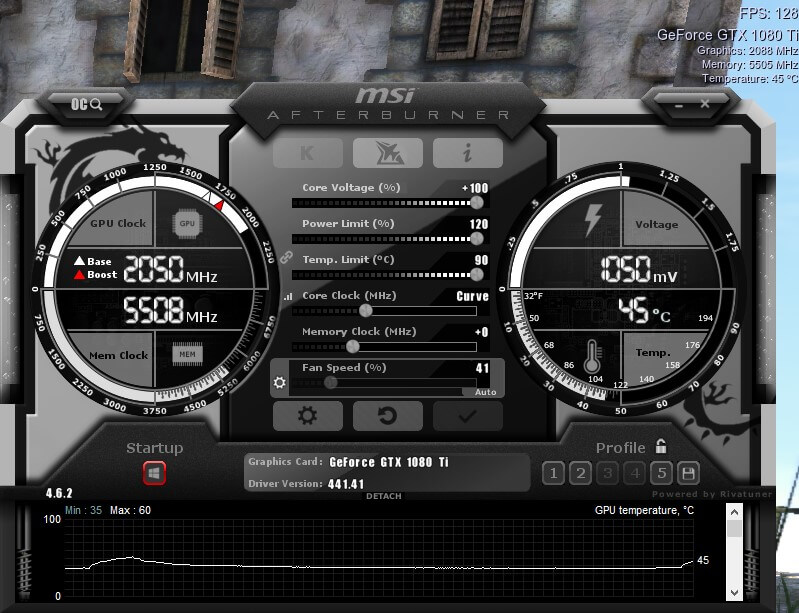
2037mhz with 1062mv Curve.
The ASUS ROG GTX 1080ti Strix used for the guide failed the 2050mhz/1050mv during more extensive stress tests while initially passing the Heaven benchmark. This would make it almost stable and would need adjustment to the curve to 1062mv. Reset MSI Afterburner and dial in the settings from the default curve as shown above. Make sure the GPU is below 40c so it will use the default curve. Open the curve editor by hitting CTRL+F and drag the 1062mv curve node to 2037mhz. Exit the curve editor and hit apply in MSI Afterburner. Run Heaven benchmark and ensure the 2037mhz and 1062mv numbers when the GPU is below 50c. When reaching 50c you will again lose 1 bin of 12.5mhz for a clock speed of 2025mhz.
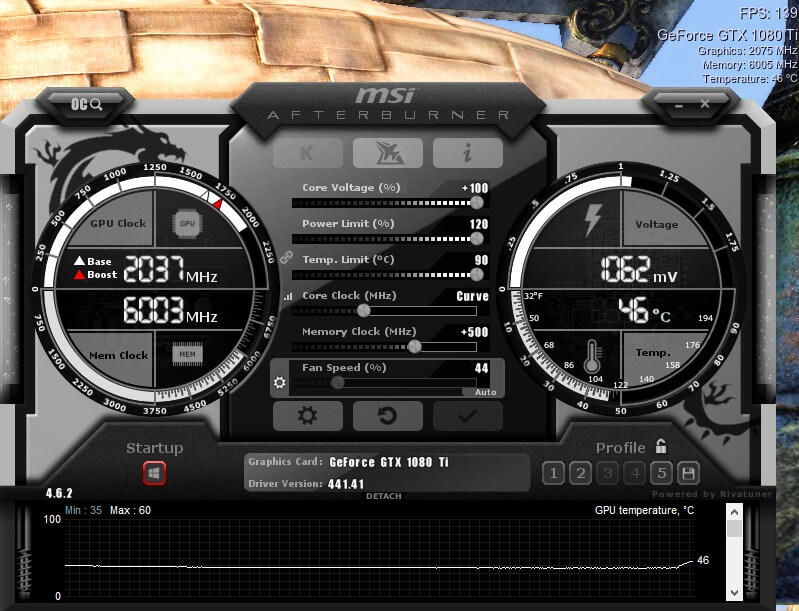
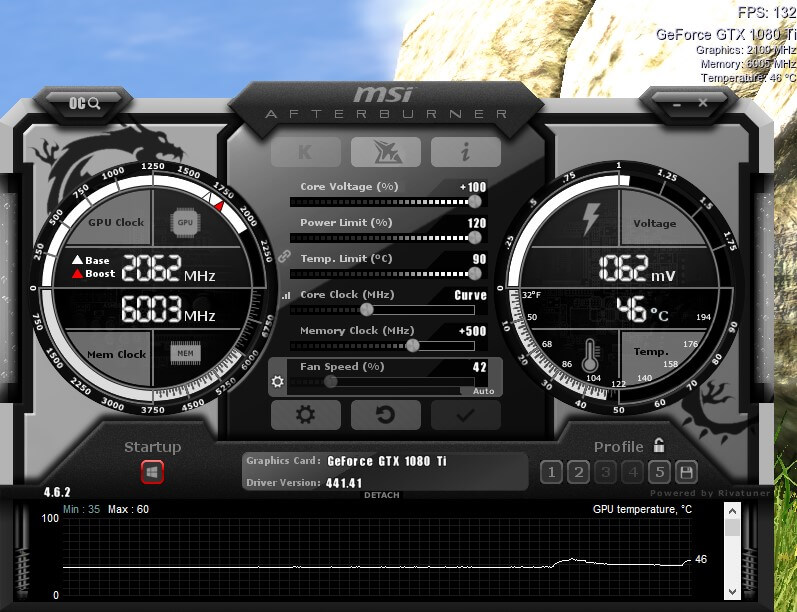
2062mhz with 1062mv Curve.
This voltage curve is when you pass 2050mhz on 1050mv and the GPU remains stable during stress testing. This is the absolute limit and is only reserved for the top 5% GTX 1080ti's with triple fans or custom water cooling loops. Either reset MSI Afterburner and dial in the default curve settings as shown above. Or when using 2037mhz with 1062mv. Then proceed to drag the 1062mv node to 2062mhz. Then exit the curve editor again and hit apply in MSI Afterburner. Make sure the GPU is below 40C before starting the Heaven benchmark. Here you want to verify the 2062mhz and 1062mv numbers when the GPU is below 50c. Here as you will again lose 1 bin of 12.5mhz when the GPU heats up above 50c.
1987mhz with 1031mv Curve.
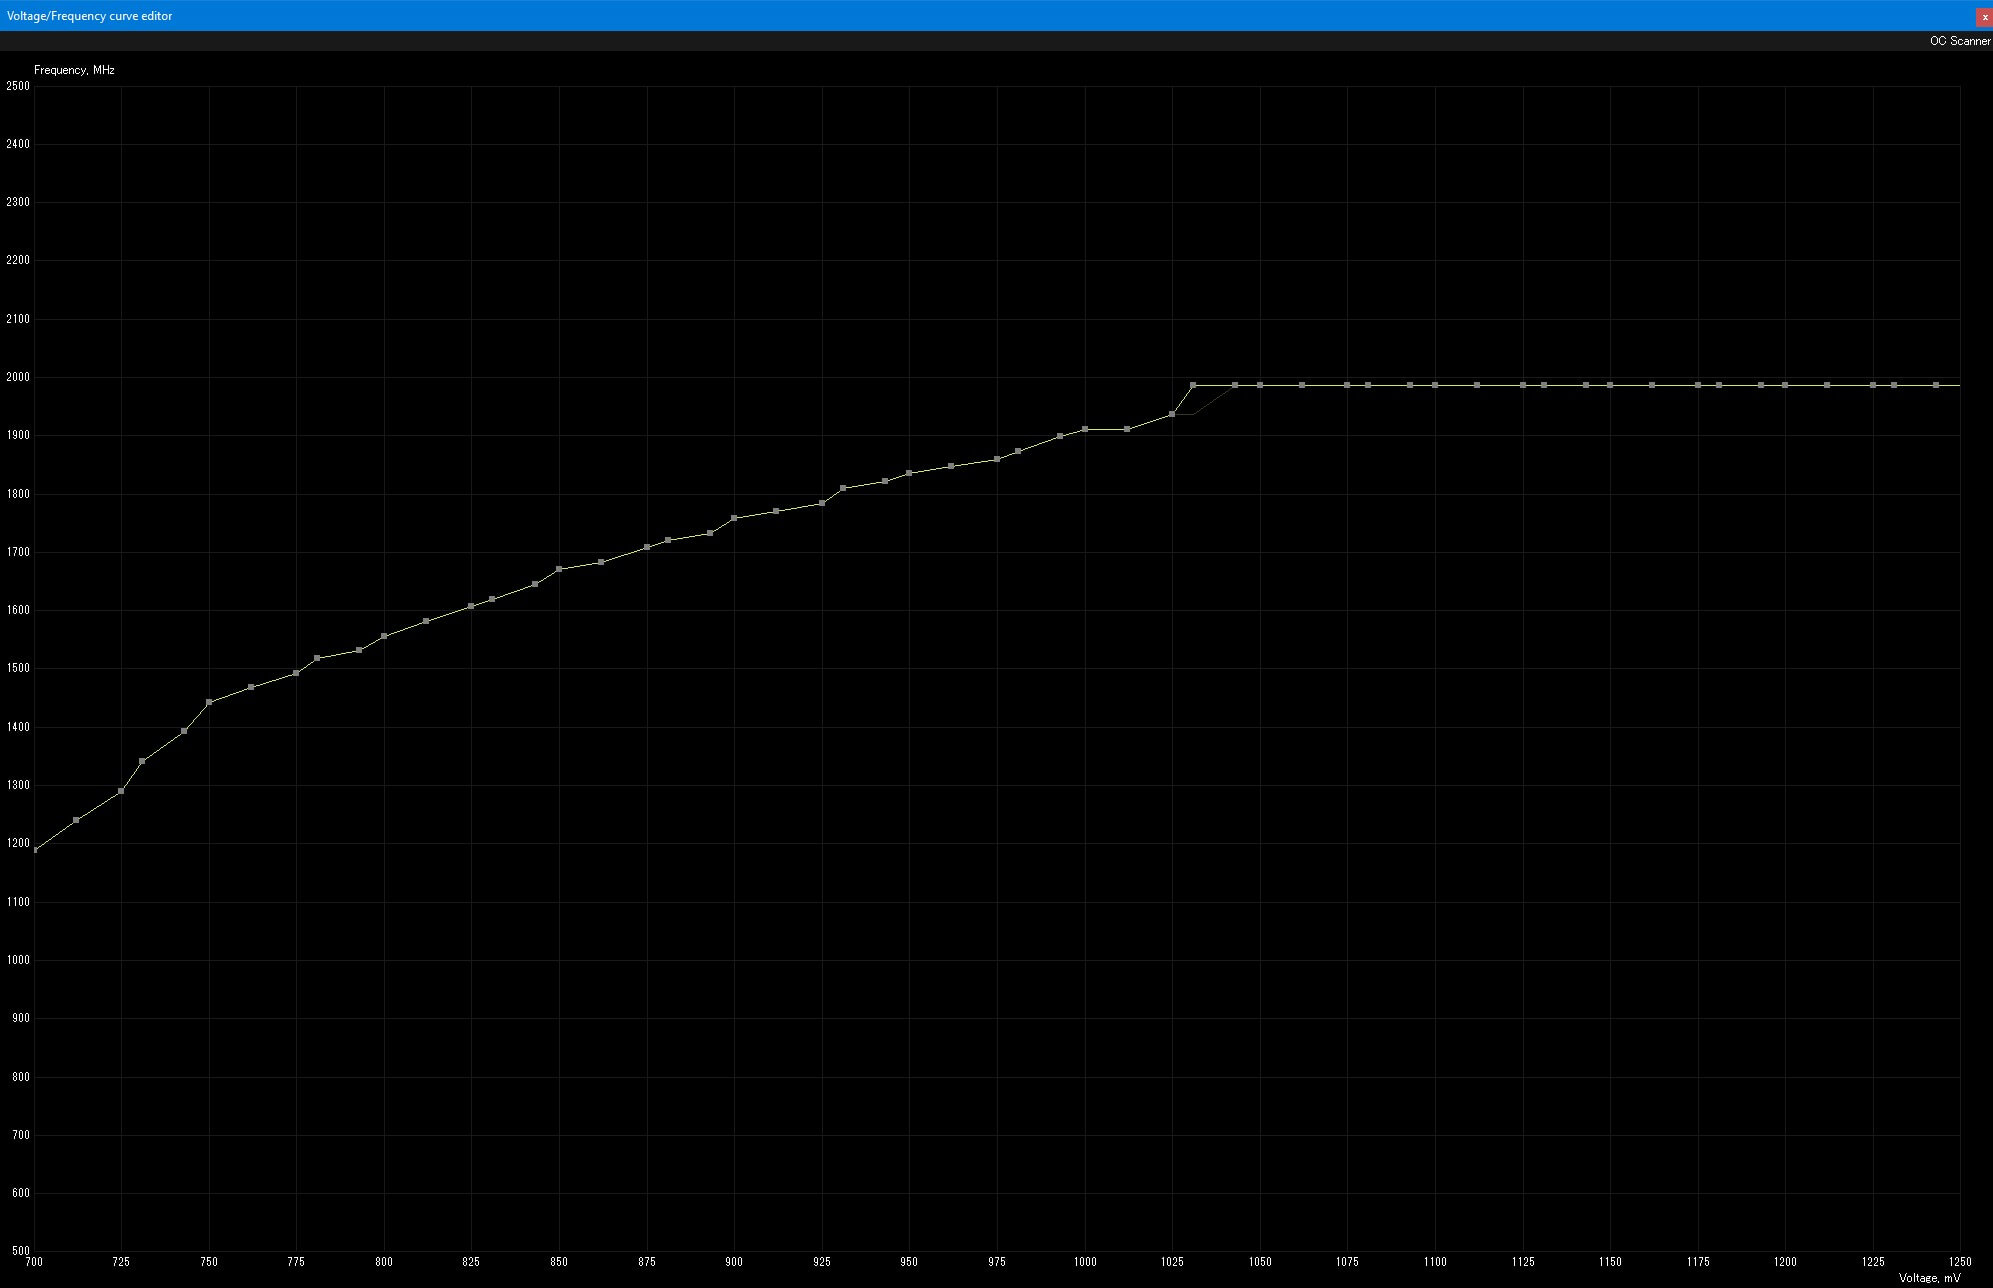
The 1031mv is best for dual fan GPU's that can not remain stable using the 1050mv curve. You want to get the default curve by resetting MSI afterburner and dial in the default curve settings shown above. And make sure to let the GPU cooldown below 40c for the default curve. Open the curve editor by hitting CTRL+F and drag the 1031mv node to 1987mhz. Exit the curve editor and hit apply in MSI Afterburner. Start the Heaven benchmark and verify the 1987mhz and 1031mv numbers. Let Heaven run for a couple of minutes until it levels out the temperature. You will here as well lose 1 bin of 12.5mhz when the GPU heats up above 50c with a clock speed of 1974mhz.
Memory Frequency.
Tweaking the memory is the same as with the novice method. Simply use the slider to dial in +450 in MSI Afterburner and click apply. Use Heaven benchmark with your preferred voltage curve and let the benchmark run for a couple of minutes. Check for artifacts and stuttering. When the short test passes bump up the memory frequency +50 and run Heaven again, rinse and repeat until it fails. Most 1080ti's can reach a memory frequency of 6000mhz. But some GTX 1080ti's can go as high as 7000mhz on the memory frequency.


