- Tech, OC'ing, SEO and more
- Hits: 31567
Article Index
Getting Started.
Plug-in the USB male to a USB 2.0 Female on your PC make sure you use your 3.0 ports for external HDs and USB sticks. Download the latest version of the VPC Configuration Tool from Virpil here: https://virpil-controls.eu/downloads/software.html and install the software on a desired HD or SSD. When connecting your joystick for the first time windows will install some default drivers and it should show up in Devices and Printers. Also, check if your RGB light turns on when connecting the joystick if it does not turn on make sure you have connected the plug inside the grip to the base correctly.
Firmware Update.
Next step is to update the firmware of your Joystick with the latest version, an image is added to show the steps and the location of each step inside the VPC Config Tool.
- Click on Firmware in the VPC Configuration Tool,
- Select the correct device, if using multiple devices unplug all but 1 to prevent confusion.
- Select the correct *.hexc, if multiple files exist check your devices with the latest file date.
- Click on the big blue "Start auto firmware update"
- This window tells you when the update is done and to go to the next step in the process.
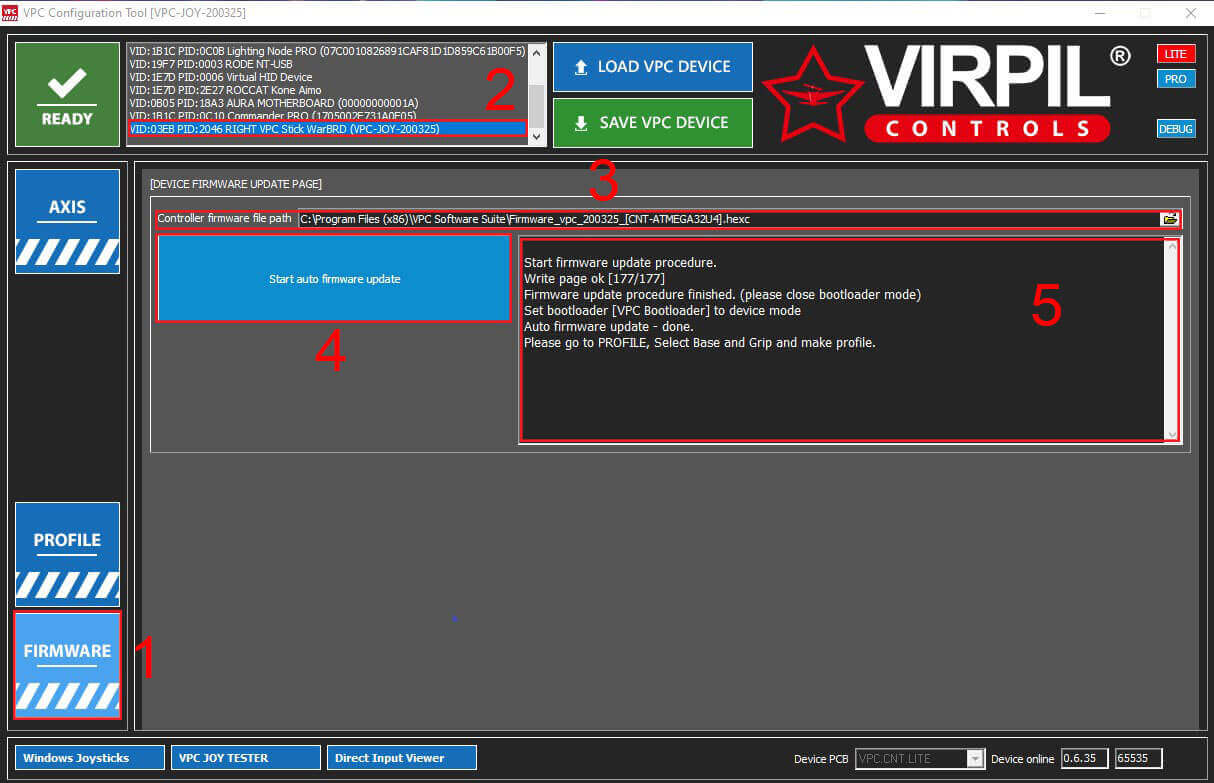
The update should last a minute maybe more if you're on an older PC but the software will tell you when it is done in the dark grey window with the steps taken for the update process.
Profile.
This section is more clear since the instructions are included within the VPC Configuration Tool but the step is included in this guide to prevent confusion.
- Select the Profile tab.
- Select your Base.
- Select your Grip.
- Select the side your device is located and used.
- Select Create Profile.
- Save to VPC Device.
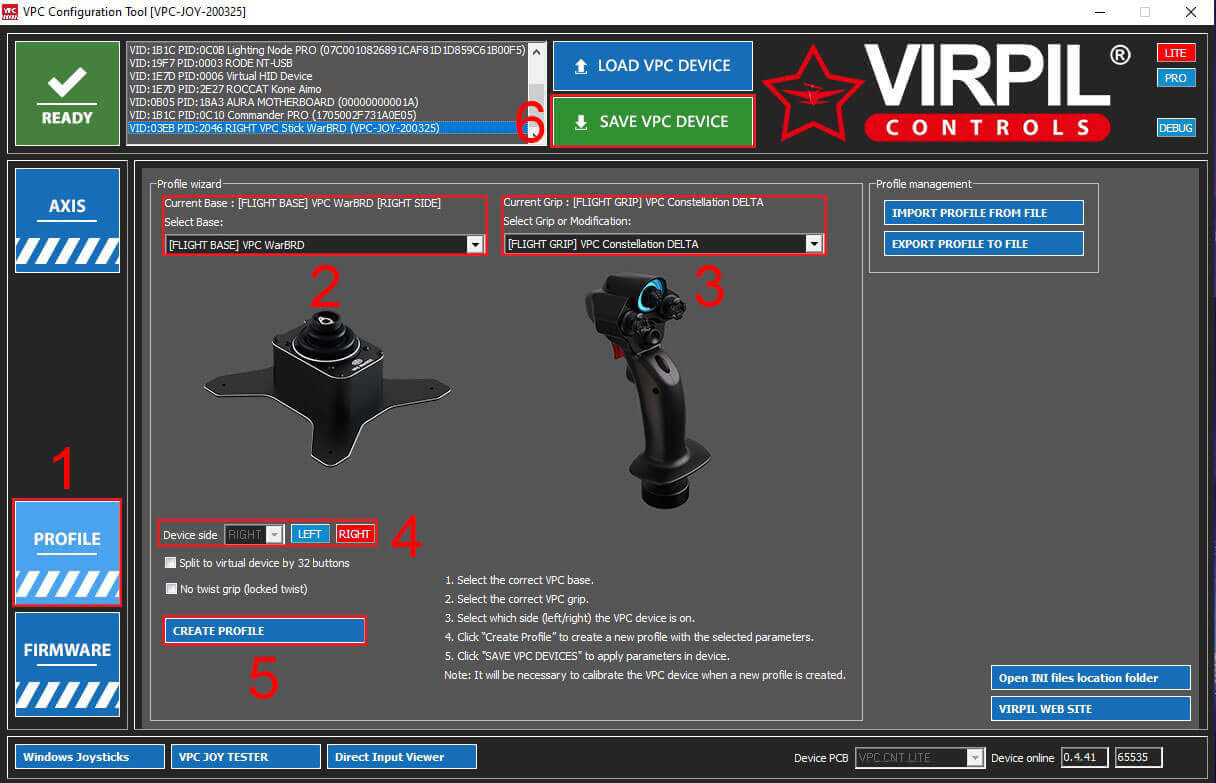
You can export the profile however the final step will be calibration and you also want to save those settings. Another final step mentioned is the "Save VPC DEVICES" this is required in the final step hence also selecting the "Save current calibration".
Calibration.
Now it is time to calibrate all the axis on your Virpil WarBRD base and Constellation grip. Very important here is NOT to use the windows calibration and that you must use the calibration from the VPC Configuration Tool and you will have to remove any windows calibration by Windows Settings and by typing the search bar "Set up USB game controllers" and then selecting "properties" select the "Settings" tab and click "Reset to default". This should clear windows calibration now head back into the VPC Configuration Tool.
- Click on the Axis tab.
- Click the "CALIBRATE AXIS"
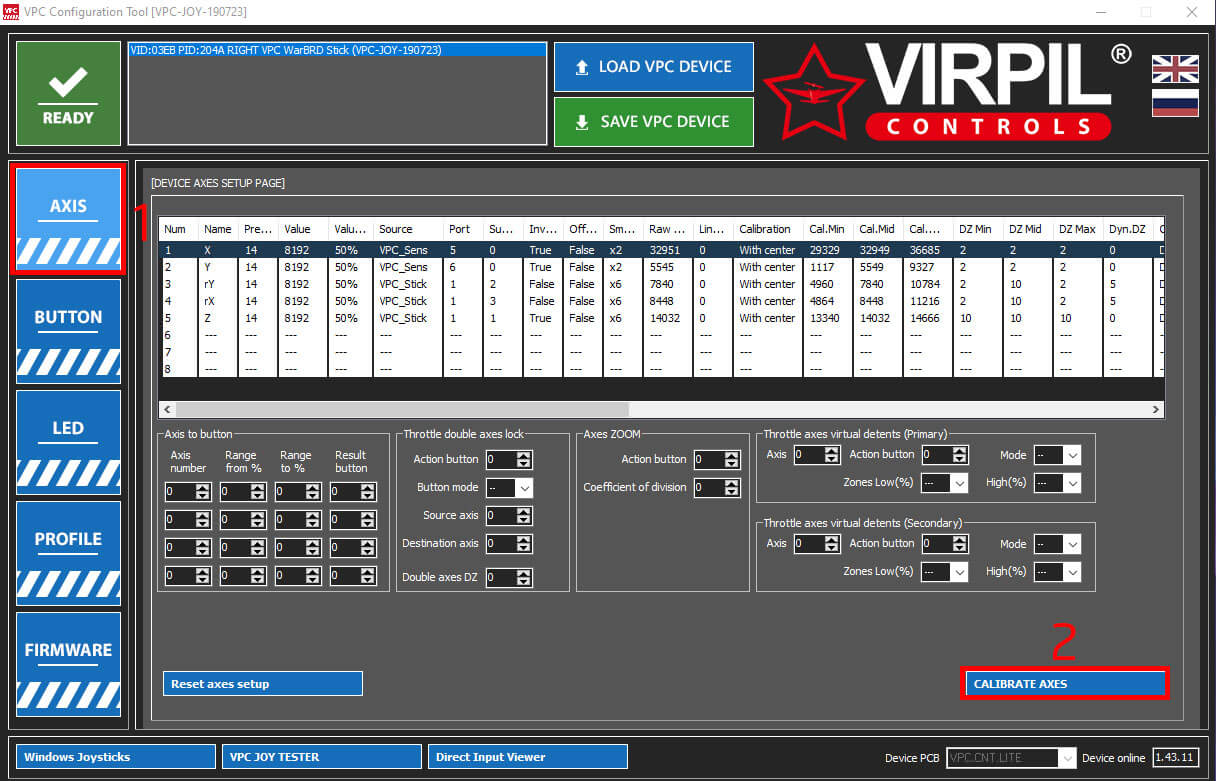
Now your in the calibration screen this screen also has instruction included you will see various visual sliders with a red background this represents your axis and they are out of alignment, in this case, there are mechanical parts inside the base measured with sensitive sensors. For this Constellation grip, you have the X and Y-Axis you gently move the stick up, down, left and right. The Z-Axis can be calibrated by twisting the Constellation grip. And now to calibrate the rY and rX that is the small joystick above the scroll wheel and gently move that up, down, left and right. Now you can see the sliders aligned to their mechanical centre and their background changed to blue.
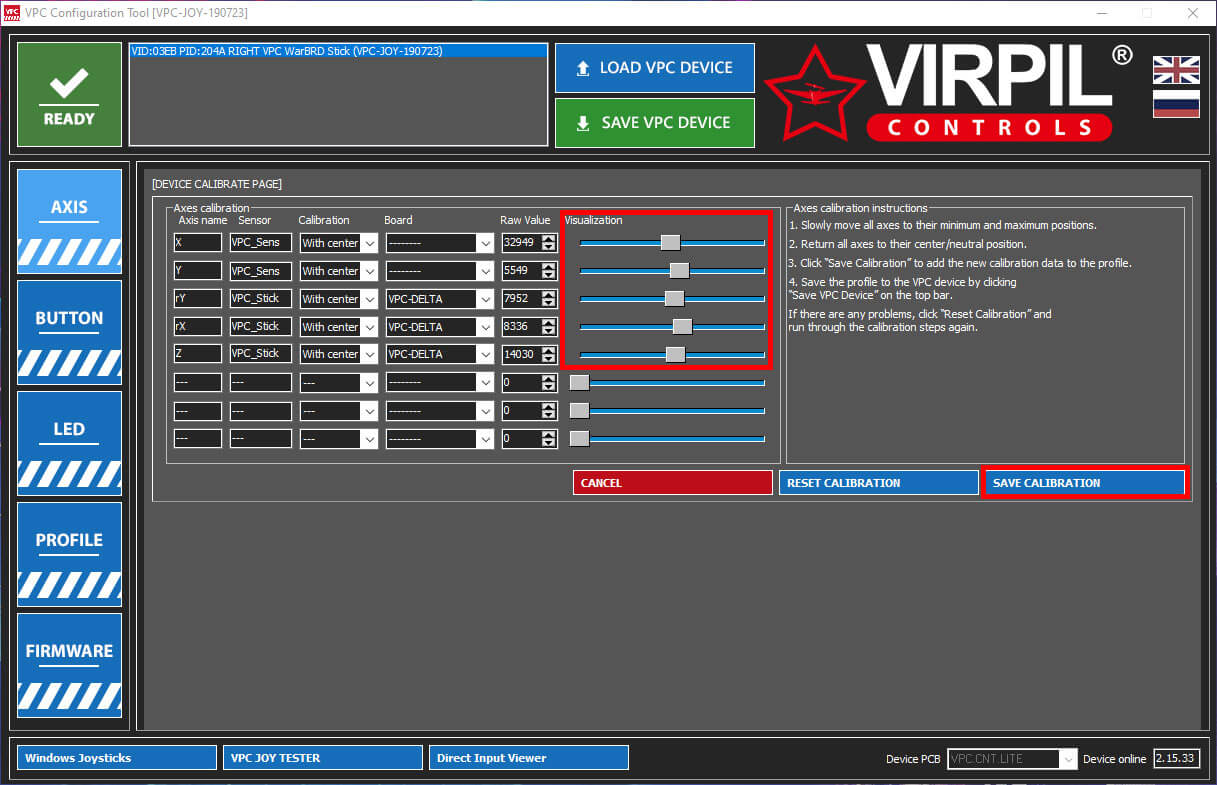
Saving to Device.
Now the final step is to head back to the Profile tab and select "Export Profile to File". Give the profile an easy to remember to name and select save. Each step is now saved to the joystick after each step but keeping a profile will be useful.
Joystick LED.
The LED is still functional but the function is hidden in the VPC Configuration Tool. Follow these steps to enable modify the colors of your LED(s)
- Select Pro.
- Select LED.
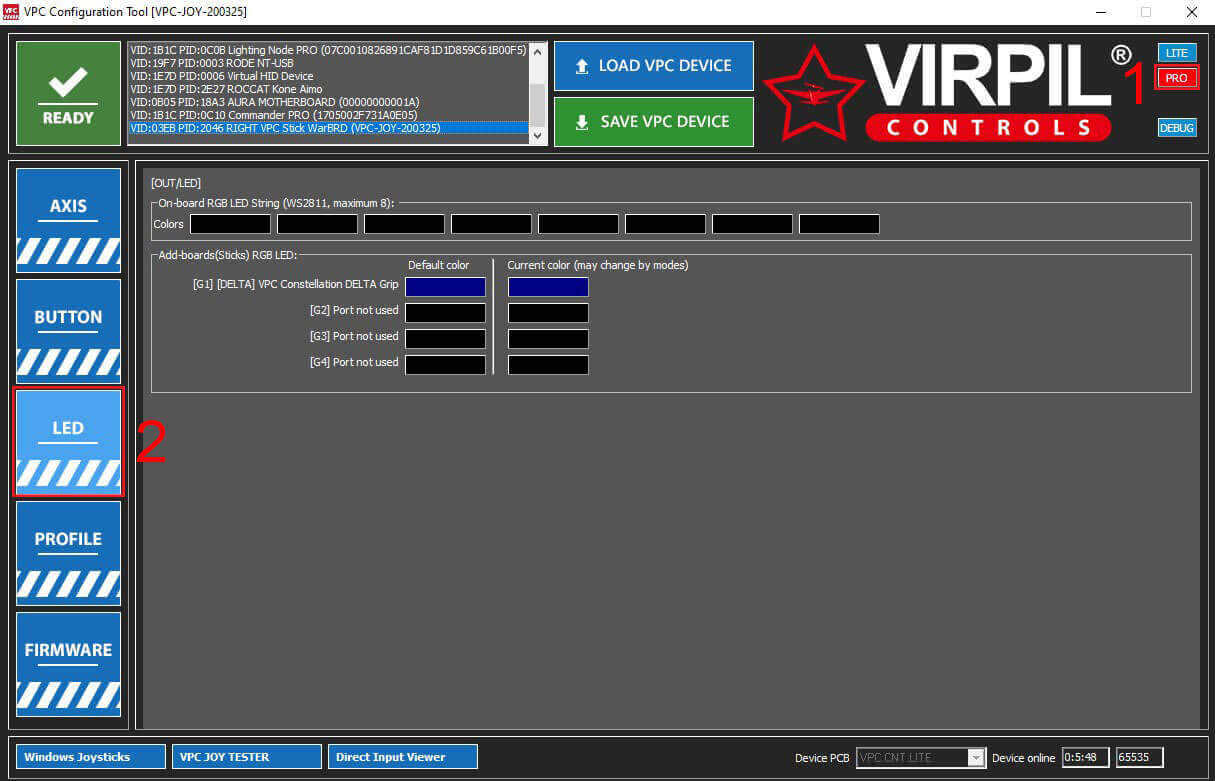
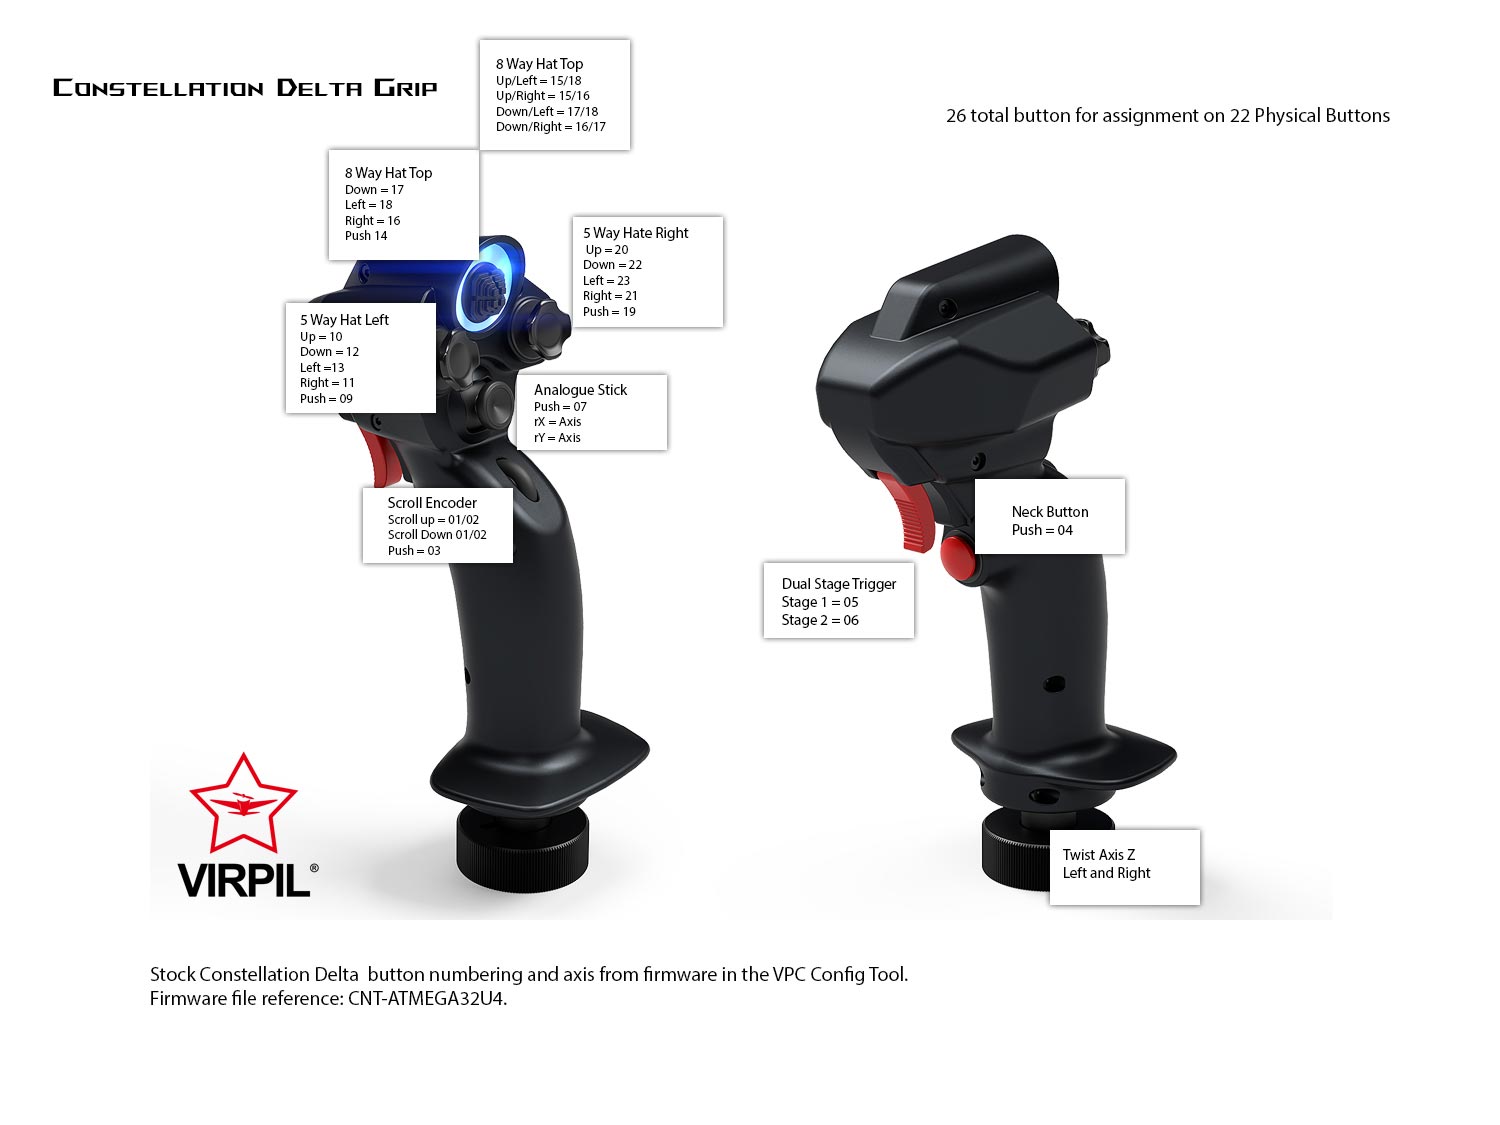
Your WarBRD and Constellation DELTA is now ready to be used in-game now you will have to configure the buttons to your choice and make sure to save those settings as well since it can be time-consuming. Below you can find a screen of all the buttons they remain the same from the previous guide.
